So you're a lover of trekking holidays, and once back at home you of course want to share the amazing nature you hiked through with others. But you end up feeling frustrated, because your photos just don't seem to do justice to the beauty of the place.
Does that sound familiar, and do you want to take home better photographs? I have some tips for you. It's a big subject, but these tips should at least help get you started.
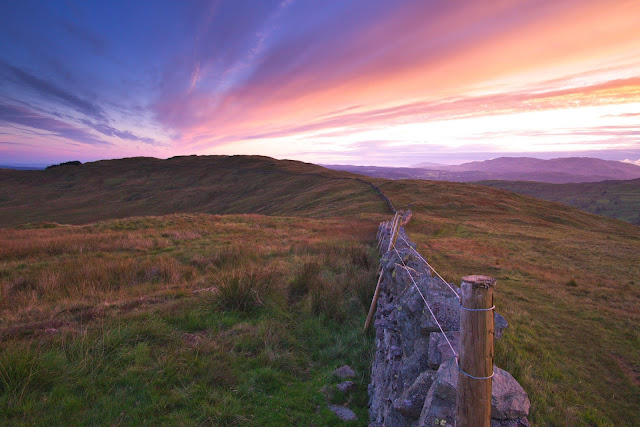 |
| A lovely evening in the Lake District, England. |
The right gear for you
Let's get photography gear out of the way first. Good gear doesn't automatically lead to great photographs, but of course you need a camera to actually be able to take photographs, and the right one is the one that fills your needs. Beside a camera, some other investments like lenses or filters are definitely worth it. Good gear doesn't have to cost very much, and by buying second hand you can also save money.
If you don't have one already, do consider buying a dedicated camera - it will have better image quality and offer more versitality than your smartphone camera, especially if you buy one that has a sensor size of at least micro 3/4 and the opportunity to change lenses. A greater dynamic range (meaning it is better with big constrasts between light and dark), the ability to play with depth of field, and a more convient way to change your settings are some of the other advantages. A ND and polorizing filter make it possible to do daytime long exposure shots of water or skies, which can make those photos really stand out. To do them, you also need a tripod. That same tripod is also good for selfies and for taking pictures in the low light situations - think of sunset/sunrise, twilight, fireworks, moonlight, stars and northern lights.
Photography gear that is lightweight and compact is better when you're on the trail, of course, which is why many trekkers - including myself - prefer mirrorless cameras over DSLR's. I have one which I can charge with a powerbank, which is really convient on those far from civilization treks. Fullframe cameras and especially their lenses are larger and weigh more than cropped sensor ones, so you need to make that balance for yourself. I shoot with a camera with APS-C sensor and don't think you need a fullframe if you don't absolutely need the best possible image quality.
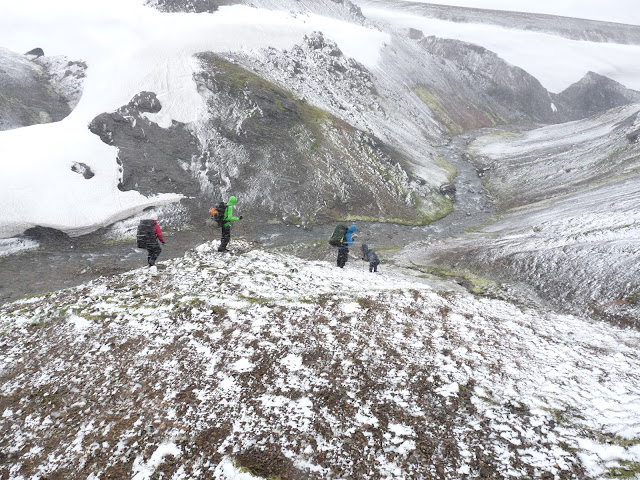
 |
| Photography using a tripod, ND filter, ultrawide lens and polorizing filter. |
Different lenses are good for different things. A few examples: a telelens for photographing wildlife and details in the landscape, an ultrawide lens for the epic effects that the distortion gives, a lens with a really low f-stop for night skies and those smooth blurry backgrounds, a macrolens for getting really close to those bugs and flowers. Don't buy them all at once however - a kit lens is just fine when you're just starting out. But it's nice to have the opportunity to later add these lenses to your repetroire. If you actually want to take those lenses with you on your trekking is another question. I have a few prime lenses, which are all light and small, so I don't mind carrying them. But some opt to take just one lens with a large zoom range, or opt for one wide angle and one telezoom lens, etc.
Finally, you need to think of something to safely carry your camera and lens(es) with on the trail that works in combination with your backpack. I've found a camera bag that clips around my waist. During rain I protect it with a seperate raincover. A camerabag that is completely waterproof would be even better, but I haven't found one yet that I like.
Print your holiday photos
If you want to improve your photos, start printing them, the bigger, the better. Nothing that makes you look critically at your own photography like having to chose which one of your photos from a recent trip is good enough to print big and hang on your own wall. And looking at it over and over will really put your mind at work - what made you chose that picture? How you would improve it if you could take the picture again?
 |
| Conifer forest in Austria. The first photo I turned into a large canvas print. Looking back at it now, I like the trail leading into the forest, and the repeating patern of the straight trees. It lacks an interesting subject however, and also looks a bit messy and dull with all the spots of harsh sunlight. |
Understand settings
Get to know your camera and what a different setting will do for your photographs. Getting to know these settings can seem really technical and complicated at first, but it's not actually that hard. Soon enough those confusing F-stops, ISO-numbers, focal lengths and shutter speeds will start to make sense, and taking your camera off the auto-mode won't be as intimidating. A good youtube video to get started:
Get off 'Auto' mode - Photography Basics.
 |
| Flowers with a blurry, out-of-focus background in La Palma. You can archieve this with larger sensor cameras by setting your apperture to a low number, like F2.8. |
Don't just point and shoot - think about your photo
We hikers all come across those views you just can't get enough of. You keep stopping in your tracks and staring. There's a good chance there's a photo there - but a nice view doesn't make automatically a good picture. Our eyes see the landscape in 3D, while a photo is 2D - there are differences. A few I've discovered so far:
- Your brains are good at ignoring distractions in the scene before your eyes, but those suddenly become apparent when you're looking at the picture - annoying clutter, rocks or branches sticking in, strangly cut off features, etc. Often, a few steps to the right or left can fix things.
- Your eyes automatically scan the landscape when it's in front of you. In a picture, the viewer needs help to make that same journey. By using elements like shapes, framing, leading lines and the placement of your subject you can lead the viewer's eye, so that they don't become confused about where to look.
- I haven't figured out yet why, but reflections just look really great in photos. It's like cameras are better than we are at picking up reflections. So use that to your advantage and photograph plenty of reflections.
So, before taking your camera out and taking the picture, make it a habit to stop first and ask yourself a few questions. What is it that you really like about the view? How can you best frame it? What is your main subject? What do you want to include, and what do you want to exclude?
 |
| Winter on the coast of north Norway. The sky wasn't very interesting, so I largely excluded it from the photo. I did like the fishing nets in the foreground, so those got included. The reflections in the middle give something to look at in the midground. Thinking through your photos like that will result in pictures you're more happy with. |
Edit your photos
Edit them. Seriously, you just can't expect the jpg file that rolls out of your camera to look like the scene you saw with your own eyes, especially while shooting a scene with big contrasts. Cameras are machines, they don't see the world as we do, so by editing you can correct that. That's not cheating (as long as you don't take it too far), instead I'd say it's not being lazy and taking control about how your own photography looks. Photoshop and Lightroom are the most famous editing programs, but there are a lot of cheaper or even free options available. I manage just fine with Rawtherapee and Gymp, two open source editing programs. You can find a lot of editing tutorials on the internet to get you started. Another tip: you can do much more with your files when you shoot in RAW-format.
 |
Unedited JPG. The foreground is too dark and the sky too dull.
|
 |
| After editing. |
Study composition
Composition is really what makes or breaks a photo. You can be in a beautiful place looking at the most beautiful sunrise, but it is still really easy to come home with unremarkable photos if you don't pay attention to what's actually in your frame and how it works together. There are some rules that will generally result in better compostions, but it's also an subjective art that defers with different styles or intentions, and you need to practise a lot to get better at. Over time, you'll get a feeling for it.
Some really helpful youtube tutorials to set you on your way:
-
Top 10 Composition Tips
-
6 Tips For Landscape Photography Composition
-
9 composition tips for landscape photography
 |
| Using a mostly frozen stream to lead the eye towards Ama Dablam, Nepal. |
Pay attention to what the light is doing
 |
| Sidelighting creating really cool (pun intented) shapes of light and shadow in Tromso, Norway. |
Light can drastically change a scene, and I don't mean just those colorful skies you get to see at sunrise or sunset if you're lucky. Direct sunlight on a landscape future, like a mountain top, draws our eyes to it like nothing else does. Light coming from the side really accentuates patterns in the landscape. Strong backlight can create powerful silhouettes. Light can be blue, or dull, or harsh, or warm. The flat light of a grey day can even out a view that would otherwise be too messy, while warm light can make colors look wonderful. By paying attention to what the light is doing at the moment and how it affects the view in front of you, you start to learn how to use it to your advantage in photographs.
 |
Sunlight falling exactly on the ridge of Tangboche, Nepal. Without that light on Tengboche this photo would be very unremarkable.
|
Have fun
It's easy to get hung up about gear and settings and compositions, but it's better to not take everything too seriously. Play around, try things out, be creative. That the whole point of photography - even more so during your holidays. So remember to just enjoy yourself!


Comments
Post a Comment